上次我們解決了資料庫的設計,而這次文章我們需要解決兩大問題:
Web 專案中,Security 會有哪些問題?
首先,再次強調,該專案是採用前後端分離,而 API 的格式也盡量符合 Restful API 的格式。以下是我覺得最直接會遇到的安全問題:
存取 API 的權限控制
專案裡面有專屬於老師、助教、學生、管理員的各自 API,很明顯不同身分的使用者不能存取其他身分的 API,不然可能會造成學生身分卻能竄改自己的成績分數等問題。
還沒登入就進行 API 的存取
同樣的,假設該使用者尚未登入,就存取了 API,也是不允許的,同時這樣的操作,也會讓系統無法判斷該使用者是誰,無法給予相對應的資料。
使用者密碼加密的問題
這個可以說是關於資料庫安全的問題,一般來說,使用者的密碼是不該以明碼的方式來存放資料庫,假設管理資料庫的人可以輕易看到每個使用者的明碼,那麼它就能夠透過你的帳戶進行登入,做一些操作,這是相當危險的事情,更別提假設資料庫被攻陷的話,後續引發的連鎖效應。
SQL injection 的問題
這個問題,基本上如果有使用後端框架裡面的 ORM 工具,就不會有這個問題,因為通常這個 SQL injection 是因為前端那部分塞一個 SQL 指令給後端,讓後端去運行,藉此來竄改資料庫的資料,但因為有 ORM 工具,通常都是直接拿變數的值去對應 ORM 的函數,所以通常不會有執行前端傳過來 SQL 指令的時候。
假設前端那邊傳來,account 、password 兩個參數,而這個學生就是這麼手賤,它把 account 輸入了一個 SQL 指令:
但是 ORM 這邊執行的函數接收方式是這樣:
1 findByAccountAndPassword(account, password);
而實際上 ORM 框架會將 findByAccountAndPassword 再轉成 SQL 指令,但只會把 account、password 變數參考進去,而不會執行該變數裡面的指令。
就像如下:
1 SELECT * FROM teacher where account= 'DELETE FROM teacher' AND password= 'xxxx'
實際上就只是把前端傳過來的 SQL 指令當作一個字串變數值而已,資料庫這並不會執行到,自然也不會刪除掉 teacher 這個表格囉。
Web 專案中,Session 會有哪些問題?
雖然專案是採 Restful API 的方式,但這邊我還是選擇採用 Session 的方案,而不是採用 JWT 來進行驗證使用者的功能。原因如下:
目前專案只是純網站,並不是還有分 APP 端,因為如果有 APP 端,可能會變成 API 這邊要統一,並且由 Web 及 APP 端存取相同介面的 API,藉此來統一,加上 APP 端這邊並沒有所謂的 Session 的方式,那我就會採用 JWT 的方式。
Session 紀錄登入後的資訊方便,且容易掌握當下的使用者人數,通常使用者登入後,我會在 session 端存放使用者的帳號,這樣在一些的 API 上,前端就不用再刻意傳學生的帳號的參數,讓後端辨別是要存取哪位學生的資料。當然前端這邊就不用再找空間來存放這樣的資訊。由後端的 session 去存放這樣的資訊,再來,因為 session 是可以主動被後端刪除的,因此做一些強迫登出的動作也方便。相較於 JWT 就比較屬於被動性。
但是 Session 還是會有一些問題需要去處理:
Session 存放位置
原本的專案,Session 其實是存放在內存中,但這樣會有一個問題,因為現在為了使用者體驗,我會將 session 過期時間設為無限,讓使用者不需要有頻繁登入的操作,登出的時間由使用者自由掌握。但這樣會導致內存中的 session 過多,因為內存的消耗是有限的,理論上內存越來越多的情況下,會導致後端運行速度變慢。
不同瀏覽器的登入操作,造成同個使用者的 Session 變多,而不是唯一
這個原因,主要是如果使用者採用不同瀏覽器進行登入的話,產生的 Session 其實是不一樣的,但都是同一位使用者,可能會導致同個使用者的 session 越存越多。
Security 的解決方案
這邊的解決方案,我都是參考我之前撰寫的一篇文章,所以在這邊就不會講太細了,有興趣的朋友可以參考這篇文章:
Spring-Security - 結合 RestfulApi 的設計
我們這邊採用的就是 Spring Security,它可以說包辦了許多 Spring 中所有 Security 的設定,並且我們可以根據自己的需求去客製化裡面的設定,但這個框架是非常雜的,所以需要花一點時間去了解。
先來談談 package 裡面的配置;
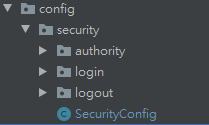
這個可以說是專案的設定,所以我習慣根 package 命名為 config ,並且新增一個 security 的 package,而這個 package 裡面就是專門設定 security 的相關事項,首先按照需求,分別有 authority 、login &logout ,這些來解決我們以上談到的問題。
直接上程式碼:
1
2
3
4
5
6
7
8
9
10
11
12
13
14
15
16
17
18
19
20
21
22
23
24
25
26
27
28
29
30
31
32
33
34
35
36
37
38
39
40
41
42
43
44
45
46
47
48
49
50
51
52
53
54
55
56
57
58
59
60
61
62
63
64
65
@Configuration public class SecurityConfig extends WebSecurityConfigurerAdapter { private SecurityService securityService; @Autowired public SecurityConfig (SecurityService securityService) { this .securityService = securityService; } @Override protected void configure (AuthenticationManagerBuilder auth) throws Exception { auth.userDetailsService(securityService) .passwordEncoder(new BCryptPasswordEncoder ()); } @Override protected void configure (HttpSecurity http) throws Exception { http.exceptionHandling() .authenticationEntryPoint(new AuthenticationEntryPointImpl ()) .accessDeniedHandler(new AccessDeniedHandlerImpl ()); http.addFilterAt(loginAuthenticationFilter(), UsernamePasswordAuthenticationFilter.class); http.logout() .logoutUrl("/api/logout" ) .invalidateHttpSession(true ) .logoutSuccessHandler(new LogoutSuccessHandlerImpl ()) .and() .csrf() .disable(); } @Bean LoginAuthenticationFilter loginAuthenticationFilter () throws Exception { LoginAuthenticationFilter filter = new LoginAuthenticationFilter (); filter.setAuthenticationManager(authenticationManagerBean()); filter.setAuthenticationSuccessHandler(new LoginSuccessHandlerImpl ()); filter.setAuthenticationFailureHandler(new LoginFailureHandlerImpl ()); filter.setFilterProcessesUrl("/api/login" ); return filter; } @Override @Bean public AuthenticationManager authenticationManagerBean () throws Exception { return super .authenticationManagerBean(); } }
程式碼解釋:
1 2 3 4 5 6 7 8 @Override protected void configure (AuthenticationManagerBuilder auth) throws Exception { auth.userDetailsService(securityService) .passwordEncoder(new BCryptPasswordEncoder ()); }
這邊就是要讓 spring security 能夠去資料庫拿取使用者的帳號密碼,因此這邊如果要客製化的話,就是客製去資料庫拿帳號密碼這段,也就是 securityService。再來,需要設定使用者密碼的加密演算法,這邊的演算法要跟註冊使用者那邊的加密演算法要一樣,這樣 Spring Security 才能根據這個演算法去跟前端傳過來的明碼進行比對,才知道是不是正確的密碼。
要建立 securityService 類別前,要先讓使用者的實體類別先去 implements UserDetails 類別
如下:
1
2
3
4
5
6
7
8
9
10
11
12
13
14
15
16
17
18
19
20
21
22
23
24
25
26
27
28
29
30
31
32
33
34
35
36
37
38
39
40
41
42
43
44
45
46
47
48
49
50
51
52
53
54
55
56
57
58
59
60
61
62
63
64
65
66
@EqualsAndHashCode(callSuper = true) @Entity @Data @NoArgsConstructor public class Student extends AbstractUser implements UserDetails { private String studentClass; @ManyToMany @JoinTable(name = "student_course", joinColumns = @JoinColumn(name = "student_id"), inverseJoinColumns = @JoinColumn(name = "course_id")) private List<Course> courses; @OneToMany(mappedBy = "bestStudent", cascade = CascadeType.ALL, fetch = FetchType.LAZY) private List<Problem> bestProblems; @OneToMany(mappedBy = "student", cascade = CascadeType.ALL, fetch = FetchType.LAZY) private List<Judge> judges; @OneToMany(mappedBy = "referencedStudent", cascade = CascadeType.ALL, fetch = FetchType.LAZY) private List<Copy> referencedCopies; @OneToMany(mappedBy = "referenceStudent", cascade = CascadeType.ALL, fetch = FetchType.LAZY) private List<Copy> referenceCopies; @OneToMany(mappedBy = "student", cascade = CascadeType.ALL, fetch = FetchType.LAZY) private List<Feedback> feedbacks; public Student (String account, String password, String name, String studentClass) { super (account, password, name); this .studentClass = studentClass; } @Override public Collection<? extends GrantedAuthority > getAuthorities() { List<SimpleGrantedAuthority> authorities = new ArrayList <>(); authorities.add(new SimpleGrantedAuthority ("ROLE_student" )); return authorities; } @Override public String getUsername () { return super .getAccount(); } @Override public String getPassword () { return super .getPassword(); } @Override public boolean isAccountNonExpired () { return true ; } @Override public boolean isAccountNonLocked () { return true ; } @Override public boolean isCredentialsNonExpired () { return true ; } @Override public boolean isEnabled () { return true ; } }
那麼就會有一些 Override 的 method 需要定義,最主要就是 getUsername 、getPassword ,Spring Security 會根據這個去拿取這個使用者的 account 、password 做一些身分驗證及登入的事項。
而 securityService 最主要做以下的事情:
1
2
3
4
5
6
7
8
9
10
11
12
13
14
15
16
17
18
19
20
21
22
23
@Override public UserDetails loadUserByUsername (String account) throws UsernameNotFoundException { Optional<Student> studentOptional = studentRepository.findByAccount(account); Optional<Teacher> teacherOptional = teacherRepository.findByAccount(account); Optional<Assistant> assistantOptional = assistantRepository.findByAccount(account); Optional<Admin> adminOptional = adminRepository.findByAccount(account); if (studentOptional.isPresent()) { return studentOptional.get(); } else if (teacherOptional.isPresent()) { return teacherOptional.get(); } else if (assistantOptional.isPresent()) { return assistantOptional.get(); } else if (adminOptional.isPresent()) { return adminOptional.get(); } else { throw new UsernameNotFoundException ("account not found" ); } }
根據 account 去不同的使用者身分的 table 拿取資料,因為這邊 account 是不會與其他身分的使用者衝突的。因此只會有一種存在的可能。
如果資料存在,則回傳 UserDetails 物件,而使用者的實體因為已經 implements UserDetails 類別,因此可直接回傳。
1
2
3
4
5
6
7
8
9
10
11
12
13
14
15
16
17
18
19
20
21
22
23
@Override protected void configure (HttpSecurity http) throws Exception { http.exceptionHandling() .authenticationEntryPoint(new AuthenticationEntryPointImpl ()) .accessDeniedHandler(new AccessDeniedHandlerImpl ()); http.addFilterAt(loginAuthenticationFilter(), UsernamePasswordAuthenticationFilter.class); http.logout() .logoutUrl("/api/logout" ) .invalidateHttpSession(true ) .logoutSuccessHandler(new LogoutSuccessHandlerImpl ()) .and() .csrf() .disable(); }
這邊的話就是設定未登入存取 API 控制、身分權限存取 API 控制、login API、logout API。要注意的就是 login 及 logout 這邊都要特別去對 session 做出來。我這邊就是登入後會在 session 存放使用者的 account,登出就會把 session 給刪掉。
可參考如下:
1
2
3
4
5
6
7
8
9
10
11
12
13
14
15
16
17
18
19
20
21
22
23
24
25
26
public class LoginSuccessHandlerImpl implements AuthenticationSuccessHandler { private final String LOGGED_IN = "logged_in" ; @Override public void onAuthenticationSuccess (HttpServletRequest httpServletRequest, HttpServletResponse httpServletResponse, Authentication authentication) throws IOException { String account = authentication.getName(); Collection authorityCollection = authentication.getAuthorities(); String authority = authorityCollection.iterator().next().toString().replace("ROLE_" , "" ); HttpSession session = httpServletRequest.getSession(); session.setAttribute(LOGGED_IN, account); ObjectMapper mapper = new ObjectMapper (); Map<String, String> result = new HashMap <>(); result.put("authority" , authority); httpServletResponse.setContentType("application/json;charset=UTF-8" ); httpServletResponse.setStatus(HttpServletResponse.SC_OK); httpServletResponse.getWriter().write(mapper.writeValueAsString(result)); httpServletResponse.getWriter().flush(); httpServletResponse.getWriter().close(); } }
登入成功後,會在 session 的屬性中存放使用者的 account,方便之後 API 的存取。
Session 的解決方案
首先關於 Session 的存放位置後來我決定放在 redis ,redis 是一個算是 NoSQL 的資料庫,但是它讀入存取的性能相當優秀,通常都會拿來當作快取的資料庫!再來,放在資料庫有一個好處,那就是我可以透過資料庫的確切得知目前 Session 有多少,根據 Session 我也可以知道目前系統的登入人數。
相較於之前存在內存空間,我認為這樣的作法彈性反而更大。再來關於多個瀏覽器的登入問題,我目前是不打算做甚麼約束,也就是說雖然不同瀏覽器的登入會造成同個使用者的 Session 存放數量變多,但我目前的做法是還不先刪除同樣使用者的 Session,為了保持使用者體驗,也有之後在未來會採用 Session 過期的策略來清理 Session。
怎麼用 redis 來存放 Session 呢?其實很簡單,只要加入以下 dependency :
1 2 3 4 <dependency > <groupId > org.springframework.session</groupId > <artifactId > spring-session-data-redis</artifactId > </dependency >
因為在 Springboot 裡面,它會默認 Session 是存在內存,但只要提供該 dependency ,在自動配置下,就會幫我們自動存入 redis 裡面。
因此只要我們在 aplication.properties 裡面設定 redis 的連線資訊就可以了:
1 2 3 4 5 6 spring.session.store-type =redis server.servlet.session.timeout =-1s spring.redis.host =localhost spring.redis.password =root spring.redis.port =6379
同時這邊也設定 Session 的過期時間 ,-1s 就代表是無限期存活 Session。
基本上,這樣就全部設定完了,剛剛在 LoginSuccessHandlerImpl 這裡面,當我們登入成功後,會在 session 裡面的屬性存放 account,基本上做這樣的動作,就會自動存入 redis 資料庫。
畫面如下:
預設的 session 存放路徑如上面這樣。基本上就是在 sessions 這裡面會存放所有的 session,而每個 sessionId 當作 key,value 就是你存放的屬性內容。
總結
做到這一步之後,基本的 Security 跟 Session 就算完成了,日後再根據需求做更改。下篇文章講解系統分解架構,幫助之後撰寫 API 功能做準備。
最後最後!請聽我一言!
如果你還沒有註冊 Like Coin,你可以在文章最下方看到 Like 的按鈕,點下去後即可申請帳號,透過申請帳號後可以幫我的文章按下 Like,而 Like 最多可以點五次,而你不用付出任何一塊錢,就能給我寫這篇文章的最大的回饋!