這篇文章主要講解如何透過 **Spring Security框架來結合RestfulApi的設計,傳統的Spring Security其實是針對一般的 MVC 去設計的,大部分網路上的範例也是用 MVC 去做設定,但現在由於是流行 Restful 的趨勢,加上目前我在寫專案的時候也是遇到要結合RestfulApi** 設計的問題,因此在這邊做個紀錄及教學。
建立 Springboot 專案
首先建立一個 **Springboot** 專案,裡面要包含 Web、Security 等的 dependency。
1
2
3
4
5
6
7
8
| <dependency>
<groupId>org.springframework.boot</groupId>
<artifactId>spring-boot-starter-security</artifactId>
</dependency>
<dependency>
<groupId>org.springframework.boot</groupId>
<artifactId>spring-boot-starter-web</artifactId>
</dependency>
|
建立 Spring Security 設定檔之 class
建立一個 class,假設叫做 **SecurityConfig,要去extends WebSecurityConfigurerAdapter**。這個 Adapter 我們可以想成它是一個 Security 基底的 class,我們可以藉由去繼承它來 Override 裡面的一些設定,進而達到客製化的功能。
程式碼如下:
1
2
3
4
5
6
7
8
9
10
11
12
13
14
15
16
| @Configuration
public class SecurityConfig extends WebSecurityConfigurerAdapter {
@Override
protected void configure(AuthenticationManagerBuilder auth) throws Exception {
auth.inMemoryAuthentication()
.withUser("admin").password("123").roles("ADMIN")
.and()
.withUser("user").password("123").roles("USER");
}
@Override
protected void configure(HttpSecurity http) throws Exception {
super.configure(http);
}
}
|
其中我們選擇 Override 兩個 configure 的 method,其兩個 method 裡面兩個參數是有不同的意義。
1
2
3
4
5
6
7
| @Override
protected void configure(AuthenticationManagerBuilder auth) throws Exception {
auth.inMemoryAuthentication()
.withUser("admin").password("123").roles("ADMIN")
.and()
.withUser("user").password("123").roles("USER");
}
|
這個代表是相關使用者的認證設定,比如說我們在這邊設定當專案啟動時,內存幫我們存放兩名使用者的帳號及密碼,其角色所代表的分別是我們定義的 ADMIN、USER。這個方式是方便我們去做測試用,而不用特地開資料庫並且開表格去存放這些使用者的資料。當然這個 method 裡面也可以設定如何連接到我們資料庫,拿取使用者的帳號密碼並進行登入的比對。在下篇文章會在講解這個地方。
1
2
3
4
| @Override
protected void configure(HttpSecurity http) throws Exception {
super.configure(http);
}
|
這個 method 可以設定那些路由要經過身分權限的審核,或是 login、logout 路由特別設定等地方,因此這邊也是設定身分權限的關鍵地方。
但現在我們先不動這邊。我們先來想想,一個 rest api,可能會有 login 的需求,在這邊不考慮嚴謹的 Restful Api,因為嚴謹的定義,是不應該用 login,更不應該有 session,因為是無狀態的。而是採用 JWT 的方式,這有機會再另外開一篇文去說明。我個人覺得,如果是純開發網頁,採用前後端分離的話,如果要用 restful api 的形式,其實是會用的有點彆扭。必要的時候還是可以不遵照嚴謹的 RestfulApi 的形式,而是採用一半一半的方式,因此這邊我們會採用傳統的 login,也就是說會有 session 產生的。
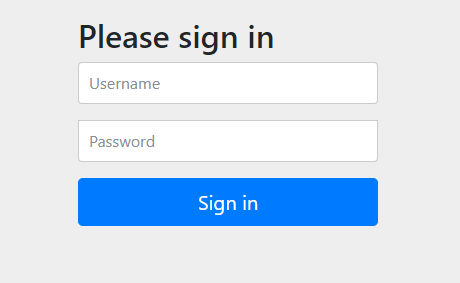
但這邊會出現一個問題,就是傳統的 Spring Security 都會有 login 的預設頁面,如下:
![]()
這是傳統的 Spring Security 的登入畫面,但現在我們是採用 Restful 的形式,也就是說在前後端分離的情況下,前端會有自己的 login 頁面,並且登入的時候發送 api 給 Backend 去做登入驗證。而傳輸的方式,是使用 json 的格式,而非傳統的 MVC 的方式。
所以後端有以下兩個地方要解決
解決 Restful 登入登出要回傳 json 格式的問題
第一個解決方案,首先我們建立 RestAuthenticationEntryPoint 之 Class,並且 implements AuthenticationEntryPoint。
程式碼如下:
1
2
3
4
5
6
7
8
9
10
11
12
13
14
15
16
| public class RestAuthenticationEntryPoint implements AuthenticationEntryPoint {
@Override
public void commence(HttpServletRequest httpServletRequest, HttpServletResponse httpServletResponse, AuthenticationException e) throws IOException, ServletException {
ObjectMapper mapper = new ObjectMapper();
Map<String, String> map = Map.of("error", "請先登入才能進行此操作");
String error = mapper.writeValueAsString(map);
httpServletResponse.setContentType("application/json;charset=UTF-8");
httpServletResponse.setCharacterEncoding("UTF-8");
httpServletResponse.setStatus(httpServletResponse.SC_UNAUTHORIZED);
PrintWriter writer = httpServletResponse.getWriter();
writer.write(error);
writer.flush();
writer.close();
}
}
|
這個 AuthenticationEntryPoint 的 Class 主要是用來設定使用者的權限進入點,也就是說使用者要使用,一定要先經過登入審核的動作,因此在這邊我們就可以做個手腳,不採用傳統 Spring Security 的 Login 頁面,透過 Override commerce 這個 method,去做設定,讓它可以直接回覆 json 格式。
這邊還有一個好處,也是前端不必再特別在每個頁面 call api 去詢問後端,是否這個人處在登入狀態。因為這邊後端完全都擋好了,前端只需要判斷每隻 API 回傳 401 status 的可能性就可以了。只要出現 401 即可導入到登入頁面。
第二個解決方案,顧名思義,我們需要建立 login 的 Api 路由。
首先建立 LoginAuthenticationFilter 去 extends UsernamePasswordAuthenticationFilter。
程式碼如下:
1
2
3
4
5
6
7
8
9
10
11
12
13
14
15
16
17
18
19
20
21
22
23
24
25
26
| public class LoginAuthenticationFilter extends UsernamePasswordAuthenticationFilter {
@Override
public Authentication attemptAuthentication(HttpServletRequest request, HttpServletResponse response) throws AuthenticationException {
if (request.getContentType().equals(MediaType.APPLICATION_JSON_UTF8_VALUE) ||
request.getContentType().equals(MediaType.APPLICATION_JSON_VALUE)) {
ObjectMapper mapper = new ObjectMapper();
UsernamePasswordAuthenticationToken authRequest = null;
try (InputStream stream = request.getInputStream()) {
Map<String, String> body = mapper.readValue(stream, Map.class);
authRequest = new UsernamePasswordAuthenticationToken(
body.get("account"), body.get("password")
);
} catch (IOException e) {
e.printStackTrace();
authRequest = new UsernamePasswordAuthenticationToken("", "");
} finally {
setDetails(request, authRequest);
return this.getAuthenticationManager().authenticate(authRequest);
}
}
else {
return super.attemptAuthentication(request, response);
}
}
}
|
這個 Filter 主要功用就是當使用者登入後,會經過的 Filter,它會去取得裡面的 request 的參數,因此在這邊我們可以更動的就是如何去取得 request 參數,因為改成 Restful 的形式,因此會先判斷 request 過來的形式是不是 json 的格式,接著取得 request 的輸入流,這個就是我們的 body 內容,因此可以將它轉成 Map 格式,在方便我們取得裡面的參數。也因此參數這邊我們可以取成 account、password,而不是傳統的 username、password,我們可以自定義。
接著我們需要定義,當登入後需要回傳成功的 json 訊息跟失敗的 json 訊息:
建立 AuthenticationSuccessHandlerImpl 去 implements 這個 AuthenticationSuccessHandler 的 class
程式碼如下:
1
2
3
4
5
6
7
8
9
10
11
12
13
14
15
16
17
18
19
20
21
22
23
24
| public class AuthenticationSuccessHandlerImpl implements AuthenticationSuccessHandler {
private final String LOGGED_IN = "logged_in";
private final String USER_TYPE = "user_type";
@Override
public void onAuthenticationSuccess(HttpServletRequest req, HttpServletResponse resp, Authentication authentication) throws IOException, ServletException {
String account = authentication.getName();
Collection collection = authentication.getAuthorities();
String authority = collection.iterator().next().toString();
HttpSession session = req.getSession();
session.setAttribute(LOGGED_IN, account);
session.setAttribute(USER_TYPE, authority);
Map<String, String> result = new HashMap<>();
result.put("authority", authority);
resp.setContentType("application/json;charset=UTF-8");
PrintWriter out = resp.getWriter();
resp.setStatus(200);
ObjectMapper om = new ObjectMapper();
out.write(om.writeValueAsString(result));
out.flush();
out.close();
}
}
|
這個 Handler 就是專門處理當登入成功後,可以採取什麼動作。同時也可以利用 Authentication 物件取得 account、authority。這個 handler 可以做兩件事情:
- 我們需要 session 去存放 account、authority,以便之後如何判斷過來的 request。這並不符合 Restful 的形式,所以這邊是採用混合的方式。因此在這邊也可以透過 request 去取得 session,再將 account、authority,去放置在 session 的 attribute 裡面。
- 再來這邊可以定義成功登入之後要回復的 json 格式,那因為是採前後端分離的格式,也就是說前端需要身分的訊息,它才能控制之後要呈現的頁面是給哪個身分的角色去看,所以我們可以回傳角色身分的資訊。
接著是要處理登入失敗的 handler,建立 AuthenticationFailureHandlerImpl 去 implements 這個 AuthenticationFailureHandler 的 class。
程式碼如下:
1
2
3
4
5
6
7
8
9
10
11
12
13
14
| public class AuthenticationFailureHandlerImpl implements AuthenticationFailureHandler {
@Override
public void onAuthenticationFailure(HttpServletRequest httpServletRequest, HttpServletResponse httpServletResponse, AuthenticationException e) throws IOException, ServletException {
httpServletResponse.setContentType("application/json;charset=UTF-8");
PrintWriter out = httpServletResponse.getWriter();
httpServletResponse.setStatus(404);
Map<String, String> result = Map.of("message", "登入失敗");
ObjectMapper om = new ObjectMapper();
out.write(om.writeValueAsString(result));
out.flush();
out.close();
}
}
|
這邊就是回復失敗的 json 訊息就可以了。
解決 Restful 上身分權限存取 API 的問題
以上的步驟是解決登入登出,及未經登入就存取 API 的問題。但還有一個問題是,使用者的身分問題,也就是說這個使用者身分是 USER 卻要去存取 ADMIN 的相關 API。以前端來說就變成是,身分是 USER 卻想存取 ADMIN 相關頁面。
因此我們需要做一些手腳:
建立 AccessDeniedHandlerImpl 去 implements 此 AccessDeniedHandler 的 class。
程式碼如下:
1
2
3
4
5
6
7
8
9
10
11
12
13
14
15
16
| public class AccessDeniedHandlerImpl implements AccessDeniedHandler {
@Override
public void handle(HttpServletRequest request, HttpServletResponse response, AccessDeniedException accessDeniedException)
throws IOException, ServletException {
ObjectMapper mapper = new ObjectMapper();
Map<String, String> result = Map.of("message", "你無權限可執行該動作!");
response.setContentType("application/json;charset=UTF-8");
response.setCharacterEncoding("UTF-8");
response.setStatus(HttpServletResponse.SC_FORBIDDEN);
PrintWriter out = response.getWriter();
out.write(mapper.writeValueAsString(result));
out.flush();
out.close();
}
}
|
這個 Handler 主要就是當 Spring Security 在前面幫你判斷是身分錯誤的時候,會經過的 handler,因此在這邊我們就能定義要回復的 json 訊息,並回傳 status code = 403。
Spring Security for Restful 設定檔之撰寫
當以上步驟全部都完成後,接著我們就能來一步一步來設定我們的 Spring Security 的設定檔。
程式碼如下:
1
2
3
4
5
6
7
8
9
10
11
12
13
14
15
16
17
18
19
20
21
22
23
24
25
26
27
28
29
30
31
32
33
34
35
36
37
38
39
40
41
42
43
44
45
46
47
48
49
50
51
52
53
54
55
56
57
58
59
60
61
| @Configuration
public class SecurityConfig extends WebSecurityConfigurerAdapter {
@Bean
PasswordEncoder passwordEncoder() {
return NoOpPasswordEncoder.getInstance();
}
@Override
    protected void configure(AuthenticationManagerBuilder auth) throws Exception {
        auth.inMemoryAuthentication()
                .withUser("admin").password("123").roles("ADMIN")
                .and()
                .withUser("user").password("123").roles("USER");
    }
@Override
protected void configure(HttpSecurity http) throws Exception {
http.exceptionHandling()
.authenticationEntryPoint(new RestAuthenticationEntryPoint())
.accessDeniedHandler(new AccessDeniedHandlerImpl())
.and()
.addFilterAt(loginAuthenticationFilter(), UsernamePasswordAuthenticationFilter.class)
.authorizeRequests()
.antMatchers("/api/admin/**").hasRole("ADMIN")
.antMatchers("/api/user/**").hasRole("USER")
.and()
.logout()
.logoutUrl("/api/logout")
.invalidateHttpSession(true)
.logoutSuccessHandler((req, resp, auth) -> {
resp.setContentType("application/json;charset=UTF-8");
PrintWriter out = resp.getWriter();
resp.setStatus(200);
Map<String, String> result = Map.of("message", "登出成功");
ObjectMapper om = new ObjectMapper();
out.write(om.writeValueAsString(result));
out.flush();
out.close();
})
.and()
.csrf()
.disable();
}
@Bean
LoginAuthenticationFilter loginAuthenticationFilter() throws Exception {
LoginAuthenticationFilter filter = new LoginAuthenticationFilter();
filter.setAuthenticationManager(authenticationManagerBean());
filter.setAuthenticationSuccessHandler(new AuthenticationSuccessHandlerImpl());
filter.setAuthenticationFailureHandler(new AuthenticationFailureHandlerImpl());
filter.setFilterProcessesUrl("/api/login");
return filter;
}
@Override
@Bean
public AuthenticationManager authenticationManagerBean() throws Exception {
return super.authenticationManagerBean();
}
}
|
看起來很雜,但其實都是把我們剛剛寫好的組件慢慢組上去而已。我們來一個一個來講。
1
2
3
4
| @Bean
PasswordEncoder passwordEncoder() {
return NoOpPasswordEncoder.getInstance();
}
|
這個剛剛沒說到,但這個是必加的,也就是說 Spring Security 強制指定你必須決定使用者的密碼你要採取哪種編碼方式,簡單來說就是加密的演算法要選擇哪個。當你選擇之後,Spring Security 就會自動幫你加密。這邊為了測試方便,可以選擇 NoOpPasswordEncoder.getInstance (); 的方式,也就是不加密,當然這個方式是不好的,在實際開發並不會採取該方式。但因為我們現在並沒有加入資料庫,而是利用內建記憶體去建立出角色的資料。之後有機會再開加入資料庫的教學。
1
2
3
4
5
6
7
8
9
10
11
12
13
14
15
| @Bean
LoginAuthenticationFilter loginAuthenticationFilter() throws Exception {
LoginAuthenticationFilter filter = new LoginAuthenticationFilter();
filter.setAuthenticationManager(authenticationManagerBean());
filter.setAuthenticationSuccessHandler(new AuthenticationSuccessHandlerImpl());
filter.setAuthenticationFailureHandler(new AuthenticationFailureHandlerImpl());
filter.setFilterProcessesUrl("/api/login");
return filter;
}
@Override
@Bean
public AuthenticationManager authenticationManagerBean() throws Exception {
return super.authenticationManagerBean();
}
|
我們先從下面這兩塊開始講起,這邊簡單來說就是建立 LoginAuthenticationFilter 的 bean,讓 Spring Security 可以採用,而在裡面就是建立的 LoginAuthenticationFilter 物件,並且設定成功及失敗的 handler,就是加我們剛剛新增那兩個 handler。最後最重要的是我們要設定該 filter 是專門 for 哪個路由,也就是這邊我們可以自定義 login 的路由,而不是採用傳統的 Spring Security 提供的表單路由。
至於下面的 AuthenticationManager,因為 filter 需要有 AuthenticationManager 的設定,但是用原本 Spring Security 的即可。因為沒設定的話,會報錯誤,而且給的錯誤訊息就是需要去設定 AuthenticationManager。
當以上的步驟都好了之後我們再來看以下的設定:
1
2
3
4
5
6
7
8
9
10
11
12
13
14
15
16
17
18
19
20
21
22
23
24
25
26
27
28
| @Override
protected void configure(HttpSecurity http) throws Exception {
http.exceptionHandling()
.authenticationEntryPoint(new RestAuthenticationEntryPoint())
.accessDeniedHandler(new AccessDeniedHandlerImpl())
.and()
.addFilterAt(loginAuthenticationFilter(), UsernamePasswordAuthenticationFilter.class)
.authorizeRequests()
.antMatchers("/api/admin/**").hasRole("ADMIN")
.antMatchers("/api/user/**").hasRole("USER")
.and()
.logout()
.logoutUrl("/api/logout")
.invalidateHttpSession(true)
.logoutSuccessHandler((req, resp, auth) -> {
resp.setContentType("application/json;charset=UTF-8");
PrintWriter out = resp.getWriter();
resp.setStatus(200);
Map<String, String> result = Map.of("message", "登出成功");
ObjectMapper om = new ObjectMapper();
out.write(om.writeValueAsString(result));
out.flush();
out.close();
})
.and()
.csrf()
.disable();
}
|
這個 configure,就是將剛剛我們寫好的組件加入進去設定裡面,才能生效。
從一開始的 exceptionHanling 可以拿來設定 authenticationEntryPoint、accessDeniedHandler,我們只要換成我們定義的
RestAuthenticationEntryPoint、AccessDeniedHandlerImpl 即可。
接著是新增 filter,也就是把我們的 loginAuthenticationFilter 跟原始的 UsernamePasswordAuthenticationFilter 去做替換,才能實現我們想要的功能。
再來主要是講解定義能夠存取路由的角色配置:
1
2
3
| .authorizeRequests()
.antMatchers("/api/admin/**").hasRole("ADMIN")
.antMatchers("/api/user/**").hasRole("USER")
|
這個方式,就是設定每個 Requests 都必須經過身分驗證的手續,再來每個路由可以設定其對應的那些身分權限可以存取。antMachters 這個 Mapping 方式,簡單來區分的話就是如果定義 /api/admin/**,的意思就是在 /api/admin/ 路徑下不管是 /api/admin/example、/api/admin/example2,都只能由 hasRole (“ADMIN”),才能存取。如果要定義明確路由只能由哪個角色存取,可以寫成.antMatchers (“/api/admin/hello”).hasRole (“ADMIN”)。而這個 Role 的名稱就是對應到,我們上面的 configure 的設定。也就是:
1
2
3
4
| auth.inMemoryAuthentication()
.withUser("admin").password("123").roles("ADMIN")
.and()
.withUser("user").password("123").roles("USER");
|
接著看 logout 的配置:
1
2
3
4
5
6
7
8
9
10
11
12
13
| .logout()
.logoutUrl("/api/logout")
.invalidateHttpSession(true)
.logoutSuccessHandler((req, resp, auth) -> {
resp.setContentType("application/json;charset=UTF-8");
PrintWriter out = resp.getWriter();
resp.setStatus(200);
Map<String, String> result = Map.of("message", "登出成功");
ObjectMapper om = new ObjectMapper();
out.write(om.writeValueAsString(result));
out.flush();
out.close();
})
|
這邊就是可以定義登出的路由,以及可以幫我們主動將 session destory 掉,還有可以添加登出成功的 handler,這邊也就是能自訂我們想要的 json 回復訊息。當然這邊也可以另外寫一個 class 去 implements 這個 handler 的 interface。為了快速可以改成 lambda 的方式寫。
最後面主要是資安的東西,也就是防止 csrf。
以上的東西都設定好後,我們就可以來撰寫一個 api 來做測試。
程式碼如下:
1
2
3
4
5
6
7
8
9
10
11
12
13
14
15
16
| @RestController
@RequestMapping("/api")
public class Controller {
@GetMapping("/admin/hello")
public Map<String, String> adminSayHello() {
Map<String, String> result = Map.of("message", "admin say hello");
return result;
}
@GetMapping("/user/hello")
public Map<String, String> userSayHello() {
Map<String, String> result = Map.of("message", "user say hello");
return result;
}
}
|
假設建立了一個 Controller 的 class 並且標註為 RestController 的形式,我們建立兩個 api,一個是在 admin 下面,一個是在 user 下面。
寫完之後,開始運行我們來測試看看。
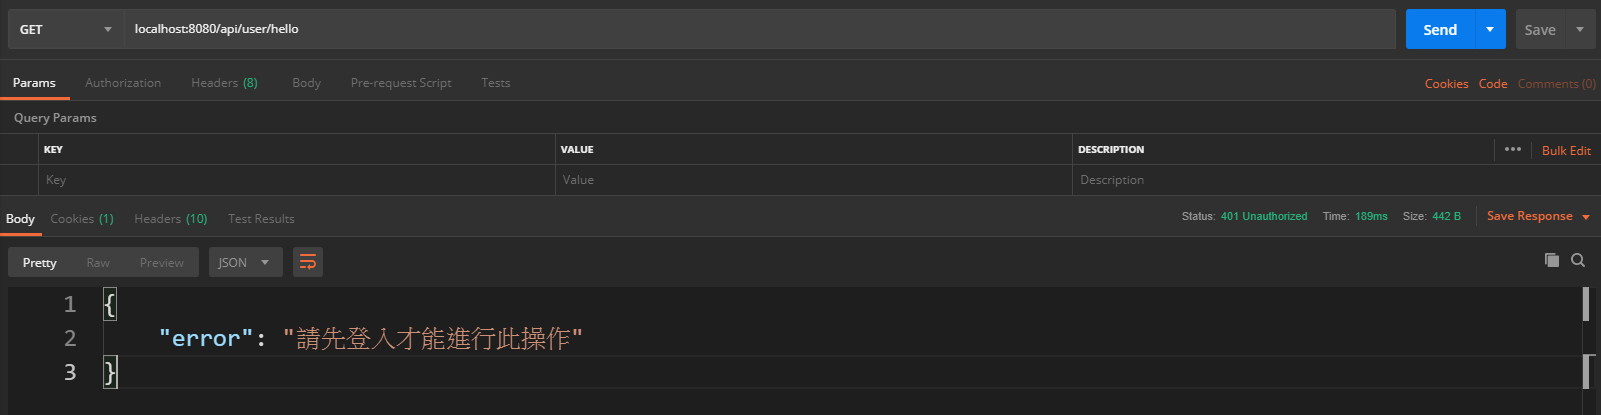
未登入的狀態下,存取這兩個 API:
![test-1]()
會得到請先登入才能進行此操作的訊息。
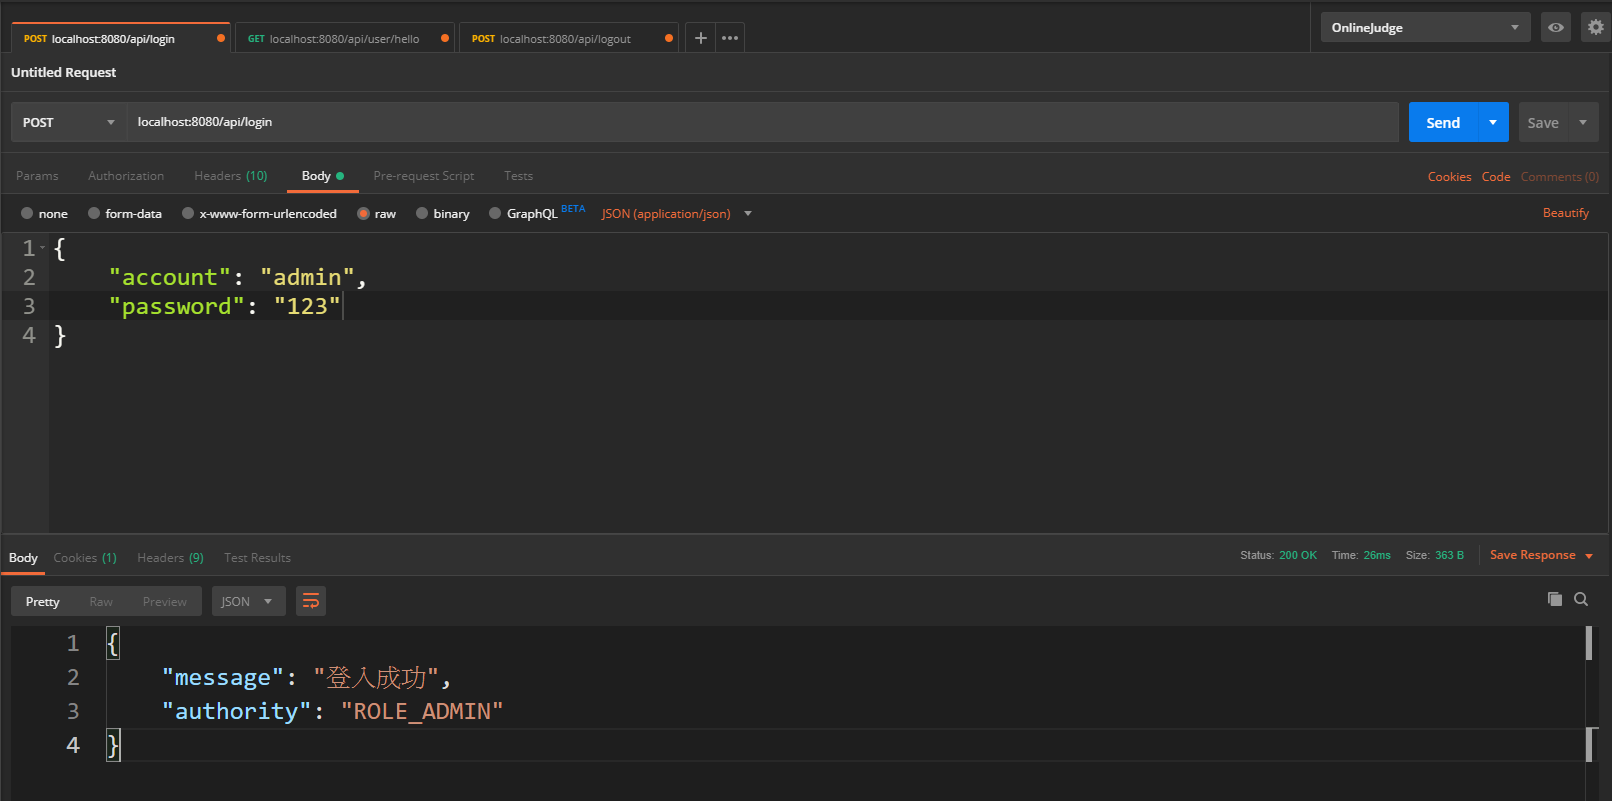
接著我們存取登入的 API:
![test-2]()
我們用 admin 的身分去登入,的確可以得到登入後成功的訊息。
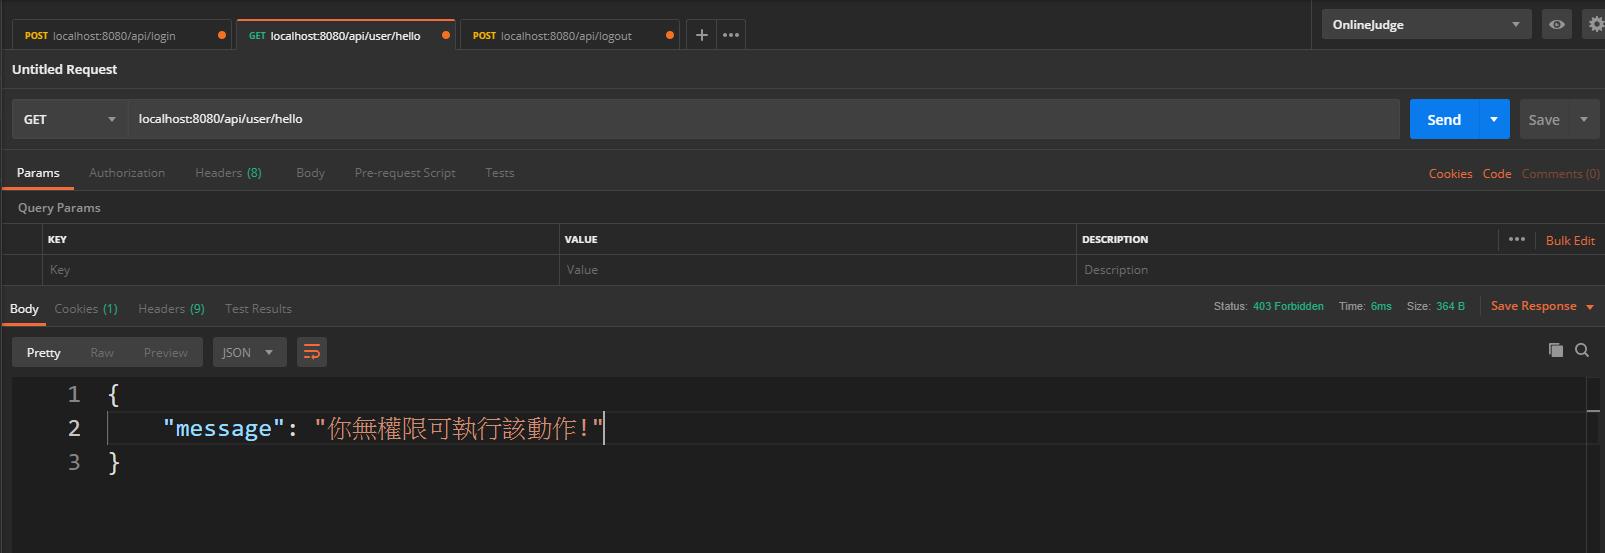
接著我們用 admin 的身分去存取 user 的 API:
![test-3]()
會得到沒有權限的訊息,沒有錯,符合我們 Spring Security 的設定。
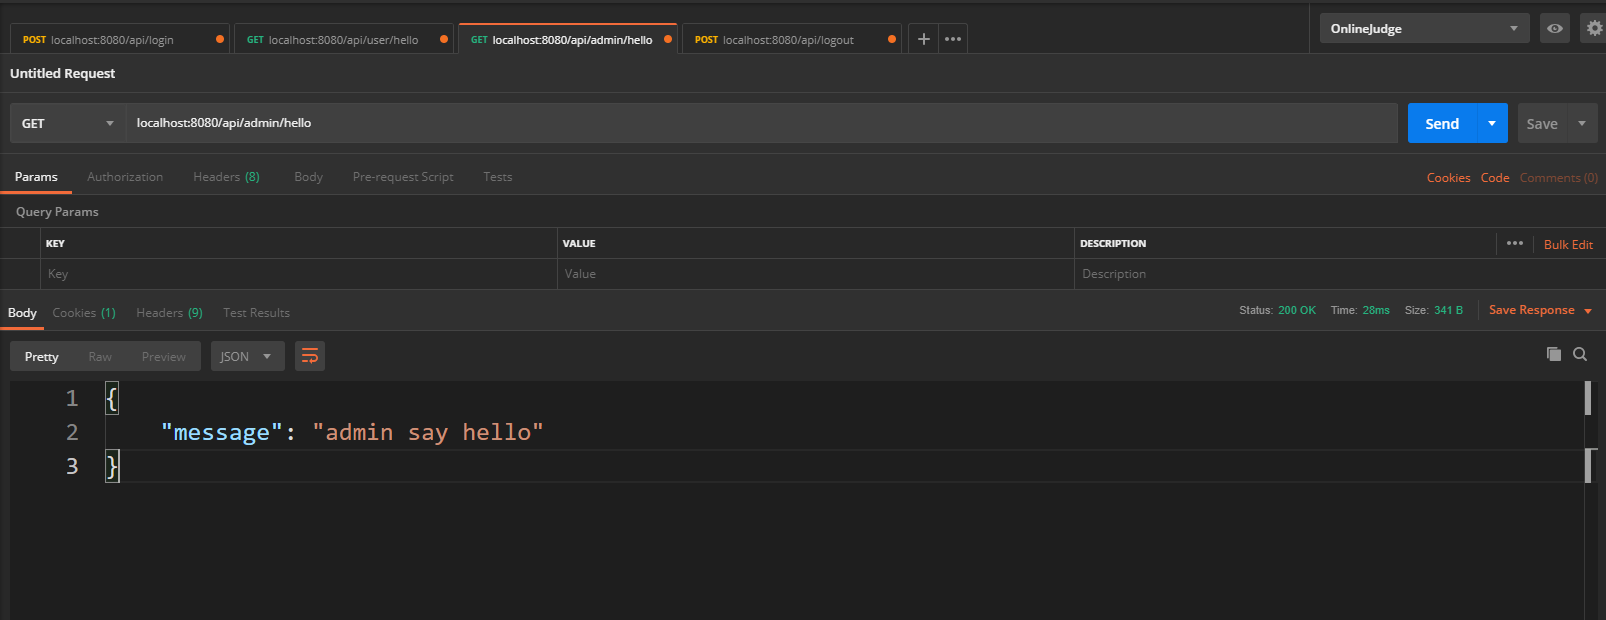
接著存取 admin 的 API:
![test-4]()
可以成功存取到,因為是符合權限的。
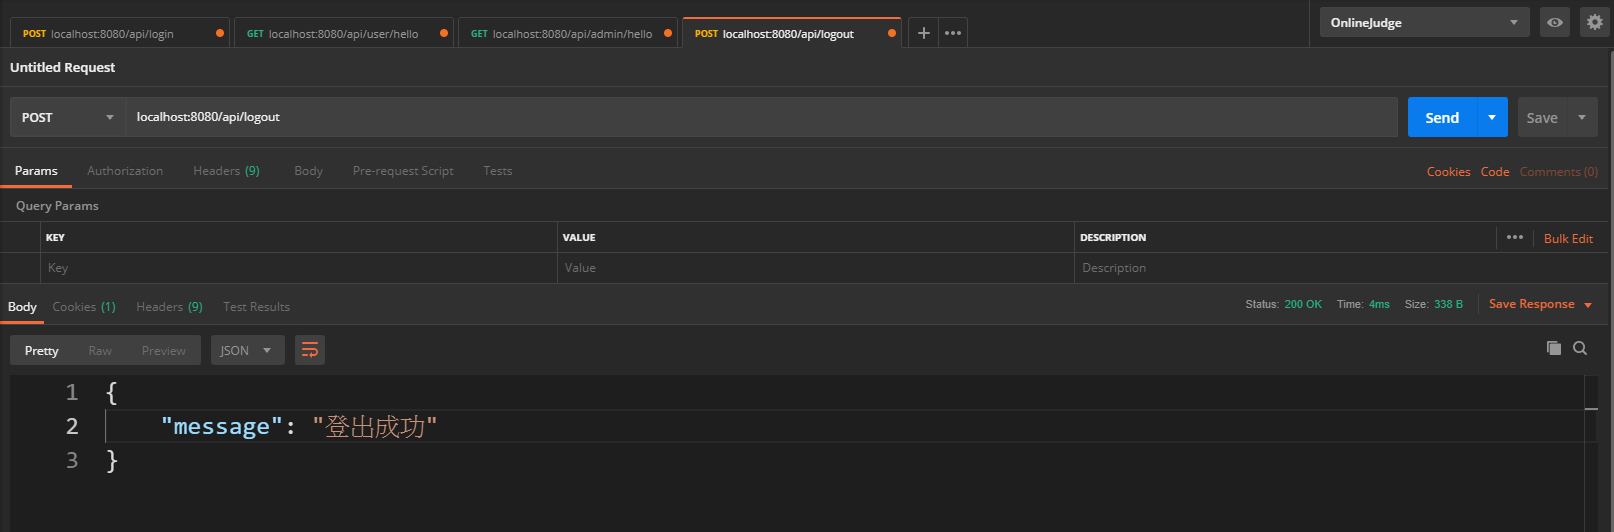
接著存取登出的 API:
![test-5]()
得到登出成功的訊息。
總結
以上的方式就是讓 Spring Security 結合 RestfulApi 的設計,當然這並不是很符合 Restful 的精神,下次有機會帶來利用 JWT 方式的 RestfulApi 的設計。此外,Spring Security 還可以結合資料庫進行角色存取的設計,這也是之後有機會再寫文分享了。